Key takeaways
- Natural light is your greatest ally: position your baby near a window at a 45° angle for soft, flattering photos
- Adapt your technique to each age: a 5-day-old newborn requires completely different poses from an 8-month-old who can sit unaided
- Safety comes first: never leave a baby unattended during a pose, always support the head, and maintain a comfortable room temperature
- Use aperture priority mode (f/1.8–f/2.8) with a minimum shutter speed of 1/125s to freeze spontaneous movement
- Patience and timing matter: photograph after a feed and a nap to capture your baby's most serene expressions
Understanding baby photography to get the most from your session
Photographing a baby is far more than pressing a shutter button! It's about immortalising unique moments that will never come again, building that precious visual family history you'll treasure for the rest of your life. But here's the thing: your little one doesn't pose on demand, wriggles constantly, and every stage of that first year calls for an entirely different approach. The techniques for a sleeping 8-day-old newborn are nothing like those for a curious 6-month-old discovering the world!
This guide helps you understand what a skilled baby photographer does, the lighting, the safe poses, the composition, the timing, so you can better appreciate their craft and prepare for your session with confidence. You'll also find practical tips if you want to capture some precious moments yourself with your smartphone or camera between professional sessions.
Natural light: your best friend for soft, beautiful photos
Natural light is what transforms a simple snapshot into a luminous, lasting memory. It wraps your baby in incomparable softness and reveals every precious detail: the fine downy hair, the velvet texture of their skin, the sparkle in their curious eyes.
Ideal positioning near a window
Place your newborn approximately 1 to 2 metres from a large window, creating a 45° angle between the window and your shooting position. This setup delivers a soft, directional light that gently sculpts your baby's features without creating harsh shadows. North-facing windows provide consistent, even light throughout the day, ideal for sessions that need to follow baby's own rhythm.
Professional tip: use a sheer white curtain as a natural diffuser if direct sunlight is too bright. You can also position a white reflector (a simple piece of cardboard wrapped in foil does the job perfectly!) on the opposite side of the window to gently lift the shadows and achieve that soft, enveloping quality of light.
The best times of day
Shoot during the hours when light is most flattering: early morning (8–10am) or late afternoon (4–6pm) when the sun sits lower in the sky. These windows offer warm, golden light that naturally enhances skin tones. Avoid midday entirely (11am–3pm), the light is too harsh and creates unflattering shadows under the eyes and nose.
Flash: friend or foe?
The flash question comes up often. According to the American Academy of Ophthalmology, camera flash causes no proven damage to babies' eyes. The medical consensus is that flash is safe. That said, direct flash remains unpleasant for newborns: it can startle them and trigger tears, which makes the session harder for everyone. If you really must use flash (when light is genuinely insufficient), bounce it off a wall or the ceiling to create indirect, diffused light. Honestly, with good window positioning and the right settings, you'll never need it.
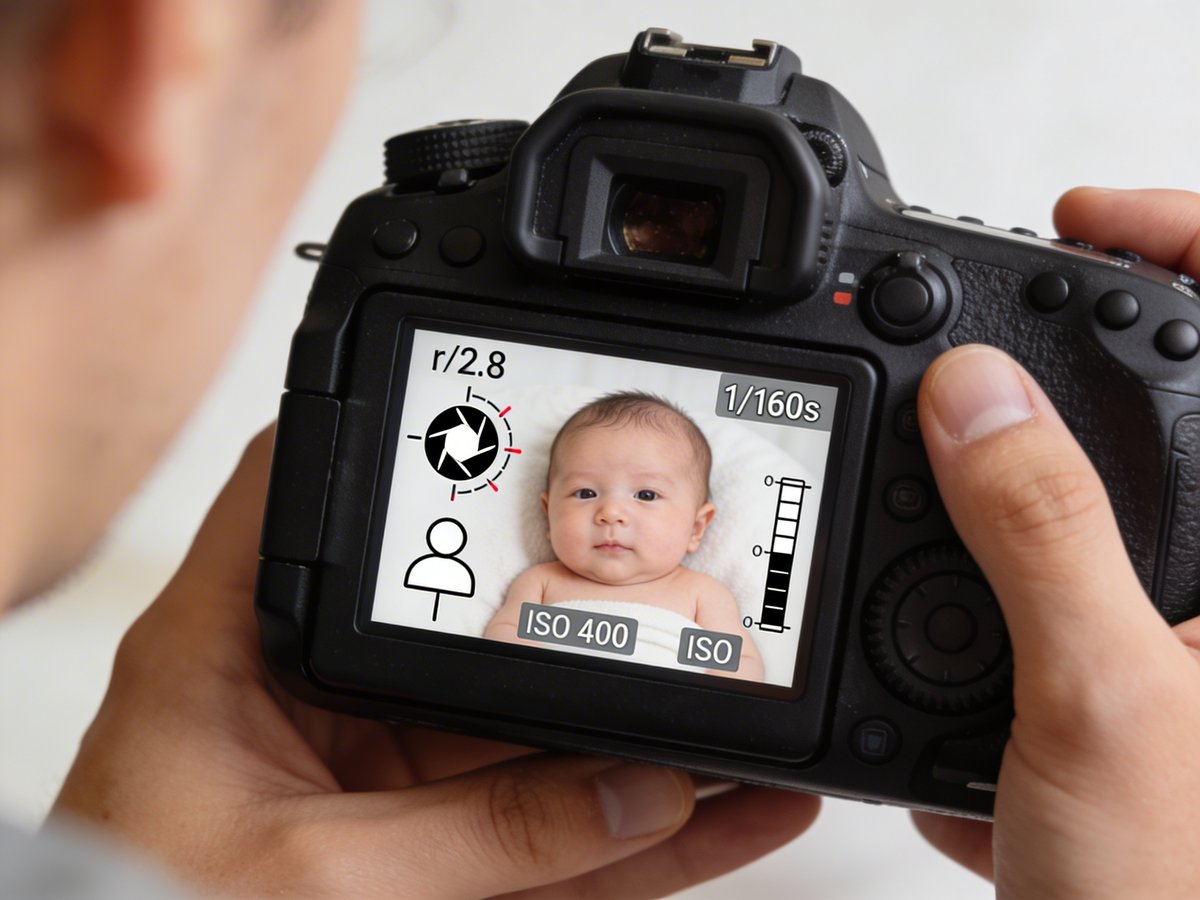
Why settings change as your baby grows
Here's an overview of the settings a professional photographer uses at each stage of your baby's development, and why they change so dramatically over just a few months. If you're shooting yourself with a DSLR or mirrorless camera, these reference points will help you understand the difference between a sharp photo and a blurry one.
| Baby's age | Aperture | Shutter speed | ISO | Recommended lens |
|---|---|---|---|---|
| 0–15 days (sleeping) | f/1.4 – f/2.0 | 1/60s – 1/100s | 100–200 | 50mm f/1.8 or 85mm f/1.4 |
| 1–3 months (awake) | f/2.0 – f/2.8 | 1/125s – 1/160s | 200–400 | 50mm f/1.8 or 35mm f/2.0 |
| 3–6 months (first smiles) | f/2.0 – f/2.8 | 1/160s – 1/200s | 200–400 | 50mm f/1.8 or 24–70mm f/2.8 |
| 6–12 months (sitting/active) | f/2.8 – f/4.0 | 1/200s – 1/320s | 400–800 | 24–70mm f/2.8 or 35mm f/1.4 |
Aperture priority mode: your everyday companion
Work in aperture priority mode (A or Av on your camera body): you control the depth of field while the camera adjusts the shutter speed automatically. It's perfect for those moments when your little one changes expression every two seconds. A wide aperture (low number such as f/1.8) creates that beautiful background blur that isolates baby and draws the eye straight to their face.
Shutter speed: freezing spontaneous movement
With a sleeping newborn, you can drop to 1/60s. But as soon as baby starts waving their tiny hands and turning their head (from around 2–3 months), switch to a minimum of 1/125s. From 6 months onwards, when they're wriggling in every direction, push to 1/200s or faster to avoid motion blur. Remember: it's always better to raise the ISO than to end up with blurry photos of your most priceless memories.
Recommended lenses for each situation
The 50mm f/1.8 remains the best value-for-money investment: a natural focal length, wide aperture for low light, and beautiful background separation. For close-up detail shots (tiny feet, hands, faces), an 85mm f/1.4 compresses perspective beautifully. If you prefer versatility, a 24–70mm f/2.8 zoom lets you vary your framing without moving, practical when baby is settled comfortably in one spot.
For more in-depth camera tips and techniques, visit the Canon UK expert guide to baby photography.
Safe poses adapted to each age
Your baby's safety ALWAYS comes before the perfect shot. Every pose must respect your baby's physical development and guarantee their absolute comfort.
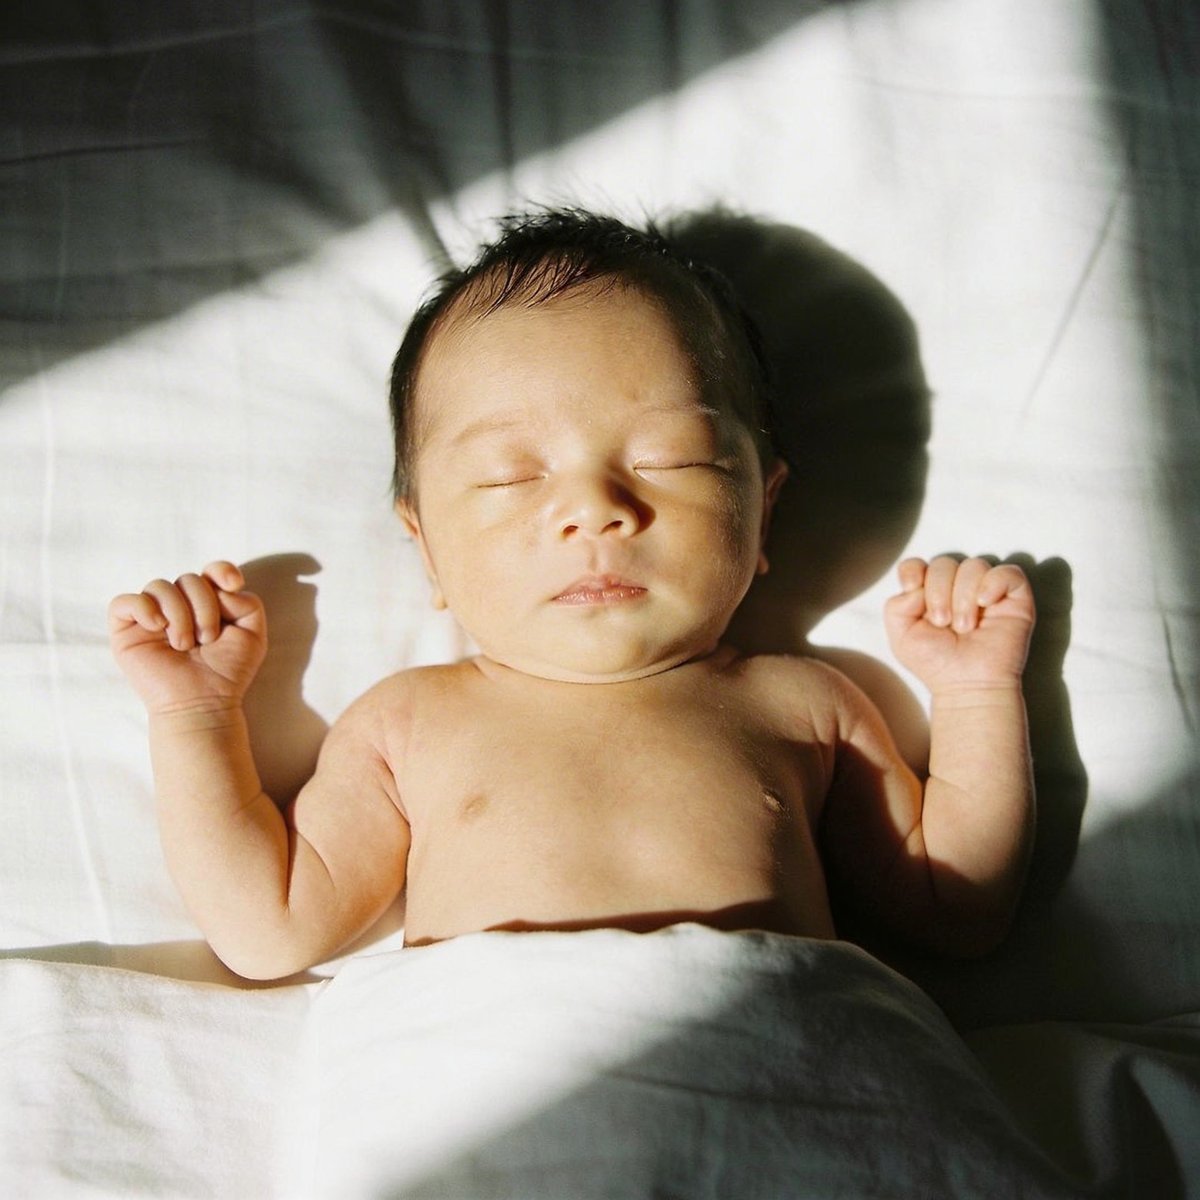
0–10 days: the magical window for curled poses
During these very first days, your newborn still has the foetal flexibility that makes classic curled poses possible (foetal position, hands tucked under the chin). This is the ideal window for those cosy, cocooning images. Always keep the room at 24–28°C so baby stays relaxed and sleepy.
Absolute safety rules:
- NEVER leave baby unsupervised, even for a second
- Always support the head and neck (neck muscles are not yet developed)
- "Suspended" or "balancing" poses are ALWAYS composite images (multiple shots merged with an adult supporting baby off-camera)
- No pressure on limbs: if baby resists a position, stop immediately

10 days–3 months: transitioning to natural poses
After 10–15 days, tightly curled poses become increasingly difficult as baby loses their neonatal flexibility. Focus instead on natural, supported positions: lying on their back, on their side with support, or cradled in their parents' arms. This age is perfect for capturing those first alert gazes and the emotional bond between baby and parents.
3–6 months: the age of expressions and tummy time
Baby is holding their head more confidently and starting to roll. You can photograph them on their tummy (supported under the chest with a cushion), sitting with support, or lying on their back to capture their wonderfully expressive faces. It's also the ideal moment for a 3-month baby photo session that captures those first real smiles.
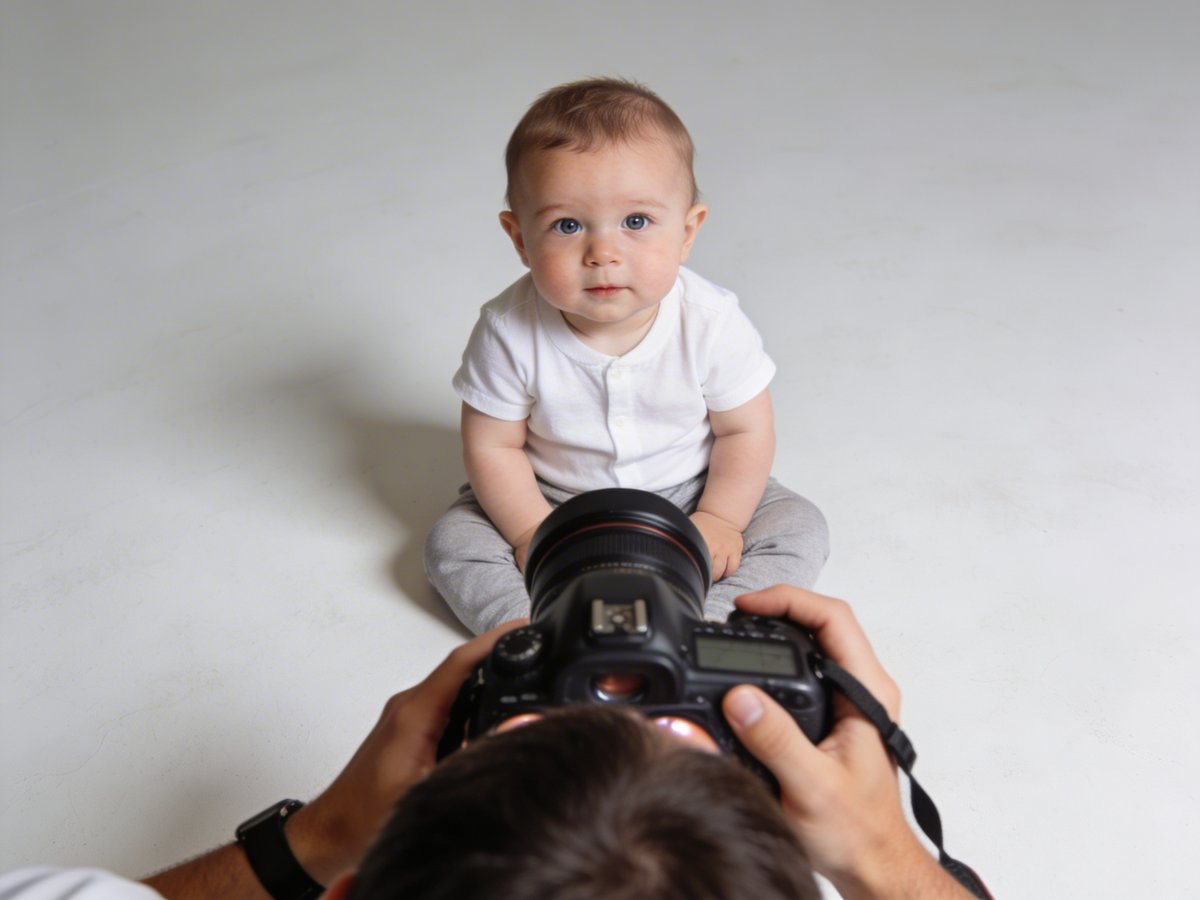
6–12 months: the star age, baby can sit!
The photographic revolution! Baby sits independently, explores, grabs objects. Creative possibilities explode: varied sitting positions, on all fours, standing with support. Stay alert to the risk of toppling and always keep a hand ready to intervene. Photograph on soft surfaces (thick rug, bed, sofa) with cushions placed around as a safety buffer.
Looking for a photographer trained in these safe techniques? To understand which age corresponds to which poses, read our complete guide to baby photo sessions by age.
Composition and framing: telling your baby's story
Get down to baby's eye level
Get low! Shooting from above creates distance, whereas positioning yourself at your baby's eye level establishes an immediate connection with the viewer. Lie on your stomach, sit on the floor, get on your knees, this shift in perspective completely transforms your photos.
The rule of thirds to guide the eye
Position your baby's eyes on the upper third of the frame (use your camera's grid overlay if available). This classic composition creates a balanced image that feels naturally pleasing to look at. Leave space in front of baby's gaze to give the image room to breathe.
Clean, minimalist backgrounds
The fewer distractions in the background, the more your little one becomes the undisputed hero of the image. Opt for plain backdrops (white sheet, textured blanket, light-coloured wall) or naturally blurred backgrounds achieved through wide aperture. Avoid busy patterns, eye-catching objects, and strong colour contrasts.
Vary your framing to tell a complete story
- Wide shot: shows baby in their environment (in the cot, on the parents' bed)
- Mid shot: frames from the upper body to the waist, ideal for facial expressions
- Close-up: face only, capturing the intensity of the gaze and the details
- Detail shots: tiny feet, hands covering face, ears, eyelashes, those micro-memories that melt hearts
Timing and preparation: the keys to a successful session
The ideal moment: after a feed and a nap
Always photograph your baby after a good feed and a restful nap. This is when they are most settled, cooperative, and inclined to smile. Avoid hungry or tired periods at all costs, even the most adorable baby becomes tricky in those moments (and that's perfectly normal).
Realistic session duration
With a sleeping newborn: allow 2 to 3 hours for a complete session including outfit changes and multiple poses. With an awake baby from 3 months onwards: a maximum of 45 minutes to 1 hour before they tire. Remember: your little one sets the pace, a good photographer will always adapt to their needs.
Temperature and comfort
Keep the room at 24–28°C for newborns who are undressed or lightly dressed during the session. For context, the NHS recommends a bedroom temperature of 16–20°C for everyday sleeping, the higher photoshoot temperature compensates for the fact that baby is undressed or minimally clothed. Prepare gentle white noise (running water, a soft fan in the background) to recreate the womb-like environment and help baby stay calm. Always have on hand: spare nappies, wipes, a dummy or bottle, and warm blankets.
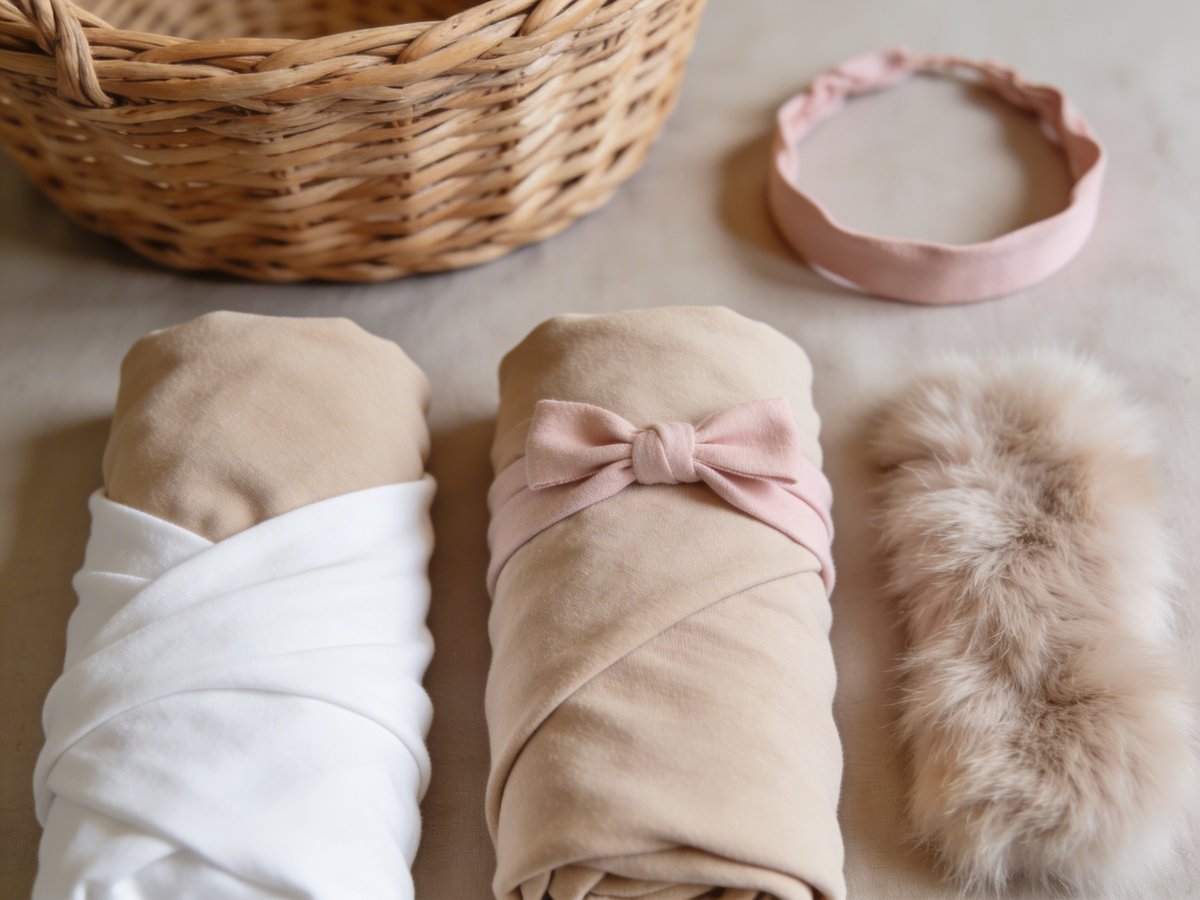
Props and minimalist styling
The essentials for professional-looking photos
- Stretch jersey wraps and blankets: perfect for comfortably swaddling baby (oatmeal, off-white, pearl grey)
- Bean bag or posing cushion: creates a soft, adjustable surface for poses
- Delicate headbands and bonnets: add a touch of softness without overwhelming the image
- Baskets and containers: create a cosy, cocooning composition (always stabilise with weight at the bottom!)
- Faux fur and soft textures: bring depth and dimension to photos
Neutral, timeless colour palette
Choose natural tones that stand the test of time: off-white, oatmeal, light grey, taupe, dusty rose, ice blue. These colours complement baby's skin beautifully and create that soft, timeless atmosphere. Saturated, bright colours tend to distract the eye from the true subject: your child.
DIY or buy professionally?
When starting out, there's no need to spend a fortune. Use what you have at home: white sheets, soft blankets, wicker baskets. For wraps, a simple length of stretch jersey fabric works perfectly well. If you fall in love with baby photography and want to go further, invest gradually in higher-quality, more durable professional materials.
To compare prices and choose the right package for your family, read our guide to baby photographer prices in the UK 2026.
Frequently asked questions about baby photography
Which lens should I use for baby photography?
A 50mm f/1.8 is the ideal starting lens: lightweight, affordable, and perfect for portraits with beautiful background blur. For more versatility, a 35mm f/1.4 allows you to include baby in their environment. In the studio, professional photographers often reach for an 85mm or 100mm macro for detail shots (tiny feet, hands, eyelashes). For age-specific guidance, read our complete guide by age.
How do I avoid using flash with a baby?
Position yourself near a large window (indirect natural light), use a wide aperture (f/1.8–f/2.8), and don't be afraid to push the ISO up to 800–1600 on modern cameras. A white reflector also bounces soft light back without dazzling your little one.
What settings should I use for a wriggly baby?
Switch to burst mode, use a shutter speed of at least 1/200s (or 1/320s for very active babies), and enable continuous autofocus (AF-C or AI Servo depending on your camera brand). Shoot in aperture priority to keep creative control while letting the camera handle the shutter speed.
How do you get a newborn into a curled foetal pose?
This pose only works during the first 10–15 days, while baby retains their neonatal flexibility. Wait until they are in a deep sleep (after 20–30 minutes of falling asleep), always keep one hand under their head and one under their bottom, and work in a very warm room (26–28°C). If baby resists, NEVER force it, their safety always comes first.
What temperature should a newborn photoshoot room be?
Between 24°C and 28°C for a newborn who is undressed or lightly clothed. The warmth helps them stay relaxed and sleepy. Keep a warm blanket on hand to cover baby between pose and outfit changes.
Can you photograph a sleeping baby without waking them?
Absolutely! Use your camera's silent mode if available, avoid flash, move slowly and avoid sudden noises. Continuous white noise (a fan, gentle water sounds) also helps mask the small, inevitable sounds during a session. Shoot by natural window light to avoid needing artificial lighting altogether.
Your turn: step behind the lens!
Baby photography is a delicate art that blends technique, patience, and above all a great deal of love. By mastering natural light, adapting your settings to each developmental stage, putting your baby's safety first at every step, and working on your composition, you create far more than photographs: you build your family's visual legacy.
Never forget: the most beautiful photos aren't necessarily the most "technically perfect" ones, but those that capture the authenticity, emotion, and unique personality of your little one. Those alert gazes, those spontaneous smiles, those endearing little expressions, that's what makes your heart skip when you flip through the album years later.
And most importantly: print your photos. An album you leaf through together on a rainy Sunday, a framed print in the hallway, a canvas above the sofa, these physical objects anchor memories in everyday life far more powerfully than a folder forgotten on a hard drive.
With 594,677 live births registered in England and Wales in 2024 (source: ONS), the first increase since 2021, every new arrival is a precious memory worth preserving. Our specialist baby photographers trained in newborn and baby techniques are here to create those priceless memories with you, with complete respect for your baby's pace and safety.
Find your baby photographer across the UK
Browse portfolios, pricing, and reviews from carefully selected photographers across England, Scotland, and Wales.
View all photographers →Related articles
- How to choose a baby photographer in the UK, Guide 2026
- Baby photo sessions by age: complete guide from 0 to 12 months
- Baby photographer prices in the UK 2026: complete pricing guide
- 3-month baby photo session: how to prepare and get stunning results
- Maternity photoshoot: when to book and how to prepare
- Baby passport photo: complete UK guide 2026